Setting Up a Spring Boot Java Application on HiTechCloud
Running Java applications on HiTechCloud is simple and efficient. Follow the steps below to get your Spring Boot application up and running.
Step 1: Upload the .jar File
Once your Spring Boot application is packaged into a .jar file, upload it to your HiTechCloud account.
Here is an example helloworld.jar file that you can use for testing.
To upload the.jar file to HiTechCloud account use one of the following methods:
- FileManager within HiTechCloud
- FTP for remote file transfers
- WebTerminal for terminal-based file uploads
- Remote SSH for secure shell file uploads
Step 2: Run the Application
- Log in to HiTechCloud and navigate to AutoInstaller.
- In the Type dropdown, select Java.
- In the Startup Script section, add the path to your
.jarfile. - Specify the domain and port on which you want the app to run locally.
- Click Create and wait for the process to complete.
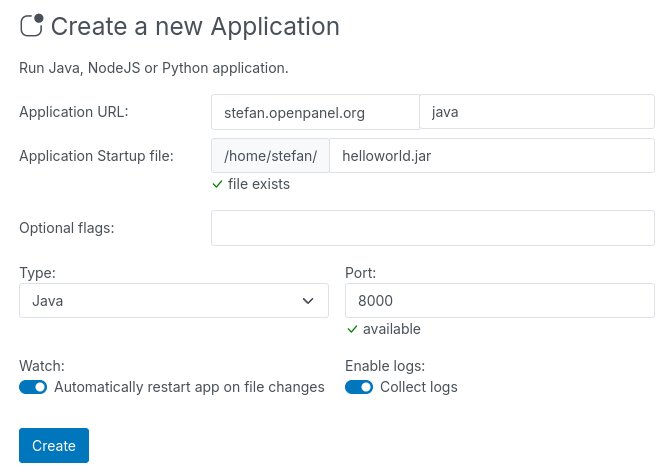
HiTechCloud will automatically install the required tools, including NPM, PM2, Java, and JDK. It will then start your application, configure a reverse proxy for the domain to the specified port, and ensure that your app starts automatically when the system boots up.
By following these steps, your Spring Boot application will be fully set up and running on HiTechCloud.