Assigning a Dedicated IP Address to a User
A dedicated IP address can then be assigned to a user through HiTechAdmin or HiTechCloudCLI.
Changing IP updates all related configuration files — including DNS zones and Caddy VirtualHosts — ensuring that the user’s all current and newly added domains are bound to the new IP address. The updated IP address will also be reflected immediately in the user’s HiTechCloud interface.
Using HiTechAdmin
The HiTechAdmin interface lists all IP addresses currently assigned to the server — these can also be viewed using the hostname -I command.
If you need to add additional IP addresses to the server, follow the official network configuration documentation for your operating system distribution.
No special configuration is required from the HiTechCloud side — newly added IPs will appear automatically in the interface.
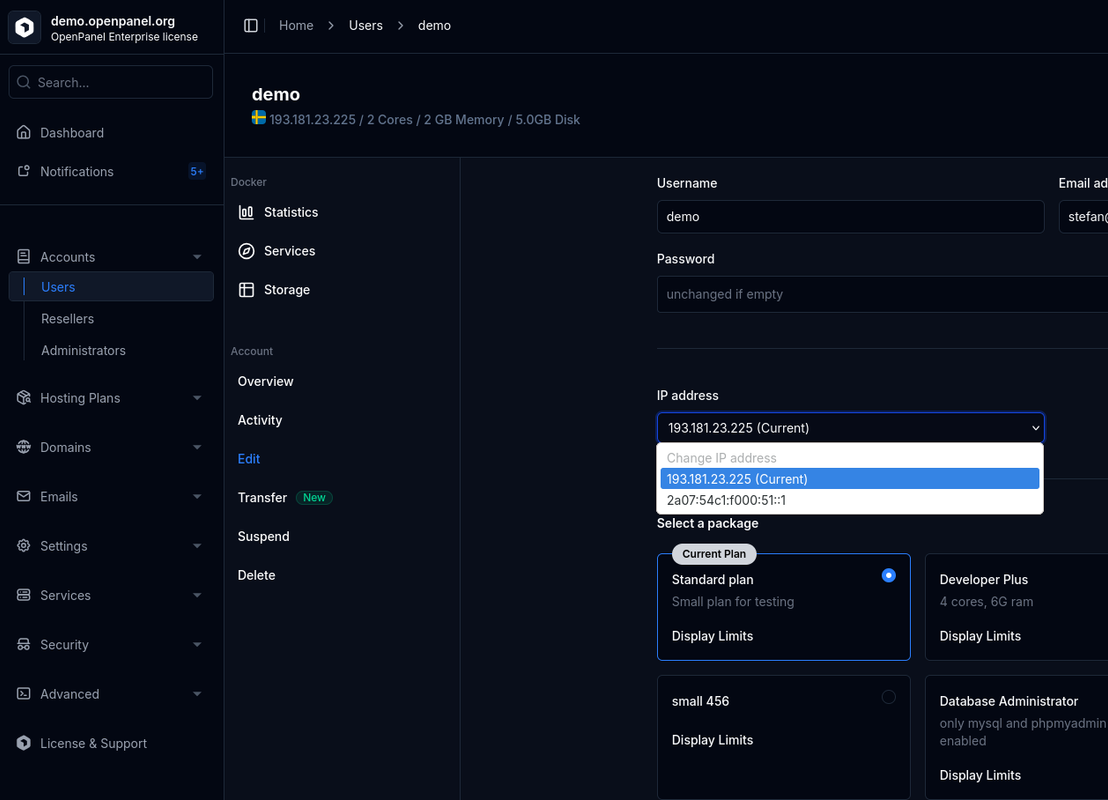
To change IP address for a user from HiTechAdmin:
-
Navigate to HiTechAdmin → Users → username → Edit.
-
Update the IP Address field with the desired dedicated IP.
-
Click Save to apply the changes.
Using HiTechCloudCLI
To change a user’s IP address from the command line, use the hitechcloudcli user-ip command:
hitechcloudcli user-ip <USERNAME> <NEW_IP_ADDRESS>
If the specified IP address is already assigned to another user, the command will abort with a warning.
To override this behavior and force the reassignment, include the -y flag:
hitechcloudcli user-ip <USERNAME> <NEW_IP_ADDRESS> -y
To remove a dedicated IP from a user and restore them to the main (shared) IP, use:
hitechcloudcli user-ip <USERNAME> delete